Welcome to our DIY guide for repairing parquet flooring. Whether you have minor damage or require a complete restoration, this guide will provide you with step-by-step instructions and helpful tips to bring your parquet floor back to life.
Parquet flooring adds a touch of elegance and warmth to any space, but over time, it can suffer from wear and tear. Instead of replacing the entire floor, repairing parquet flooring can be a cost-effective and rewarding DIY project.
- Repairing parquet flooring can be done as a DIY project.
- Regular maintenance and proper cleaning are essential for maintaining the floor’s longevity and beauty.
- Assess the condition of the floor and gather the necessary tools before starting the repair process.
- Prepare the floor for sanding by clearing the area and protecting surrounding surfaces.
- Use the correct sanding technique to achieve a smooth finish.
Understanding Parquet Flooring
Before diving into the repair process, it is crucial to understand the nature of parquet flooring and the potential problems it may face over time. Parquet flooring is a type of wood flooring composed of small, interlocking pieces of hardwood that create intricate patterns and designs. It is known for its elegance and timeless appeal, adding a touch of sophistication to any space.
Over the years, parquet flooring may experience wear and tear, including scratches, dents, and loose pieces. Additionally, changes in temperature and humidity levels can cause the wood to expand or contract, leading to gaps between the tiles. It is important to address these issues promptly to prevent further damage and restore the floor’s beauty.
Maintaining parquet flooring involves regular cleaning using a soft broom or vacuum cleaner to remove dirt and debris. It is advisable to avoid wet mopping the floor, as excessive moisture can seep into the wood and cause damage. Instead, use a damp cloth or specialized wood floor cleaner for occasional deep cleaning.
By understanding the unique characteristics of parquet flooring and being aware of potential issues, you can effectively repair and restore your floor to its former glory. In the following sections of this DIY guide, we will walk you through the steps of repairing parquet flooring, providing you with the knowledge and confidence to tackle this project.

Parquet flooring can face several common problems over time, including:
- Scratches and scuffs from furniture or heavy objects
- Dents and indentations caused by dropped items or high heels
- Loose or damaged tiles due to wear and tear
- Gaps between tiles caused by changes in humidity levels
- Discoloration or fading due to prolonged exposure to sunlight
Understanding these issues will help you identify the specific repairs needed and choose the appropriate solutions. Whether you are dealing with minor scratches or significant damage, this DIY guide will provide you with the necessary steps to restore your parquet flooring to its original beauty.
Assessing the Floor and Gathering Tools
Before you begin repairing your parquet flooring, it’s essential to thoroughly assess the floor’s condition and ensure you have the right tools at hand. Assessing the floor will help you identify the specific areas that require repair or restoration. Inspect the entire surface for any signs of damage, such as cracks, scratches, or loose tiles. Take note of any areas that need immediate attention so that you can prioritize your repair work.
Once you have assessed the floor, it’s time to gather the necessary tools for the repair project. Having the right tools will make your job easier and more efficient. Here is a list of essential tools you will need:
- Hammer
- Chisel
- Pliers
- Putty knife
- Wood filler
- Sanding machine or sandpaper
- Varnish or protective finish
- Paintbrush or roller
Make sure your tools are in good condition and suitable for the task. It’s also a good idea to wear protective gear, such as safety goggles and gloves, to ensure your safety during the repair process.
| Tool | Image |
|---|---|
| Hammer |  |
| Chisel |  |
| Pliers |  |
With the floor assessed and the tools gathered, you are now ready to move on to the next step of the repair process. In the following section, we will guide you through the preparatory steps for sanding the parquet floor, ensuring a smooth and flawless finish.
Preparing for Sanding
Sanding is a crucial step in parquet floor repair, but proper preparation is equally important. Here’s what you need to do before starting the sanding process.
First, ensure that the floor is free from any furniture or obstacles. Clear the area completely to allow for easy access and movement during the sanding process. This will help prevent any accidental damage to furniture or other surfaces.
Next, it’s essential to protect surrounding surfaces and walls from dust and debris. Cover them with plastic sheets or drop cloths to minimize the cleanup afterward. Secure the sheets or cloths in place to ensure they don’t shift during sanding.
Before you begin sanding, make sure that the floor is ready for the process. Inspect the floor for any nails or screws that may be sticking out. Use a hammer or nail set to countersink any protruding nails. This step is crucial to prevent damage to the sandpaper and ensure a smooth sanding process.
Take a moment to gather all the necessary tools for sanding. This may include a drum sander, an edge sander, sandpaper in different grits (from coarse to fine), a vacuum cleaner, and a dust mask for your safety. Having all the tools on hand will save you time and allow for a seamless sanding experience.
Once you have completed these preparatory steps, you are now ready to begin sanding the parquet floor. The next section of this guide will provide detailed instructions on how to achieve a smooth and even finish.

- Clear the area of furniture and obstacles
- Protect surrounding surfaces and walls
- Inspect the floor for protruding nails or screws
- Gather all the necessary tools for sanding
| Tools | Description |
|---|---|
| Drum Sander | Main tool for sanding the floor |
| Edge Sander | Used for sanding hard-to-reach edges and corners |
| Sandpaper | Available in different grits for different stages of sanding |
| Vacuum Cleaner | To clean up dust and debris during and after sanding |
| Dust Mask | Provides protection against harmful airborne particles |
“Proper preparation ensures a successful sanding process and helps achieve a flawless parquet floor repair.”
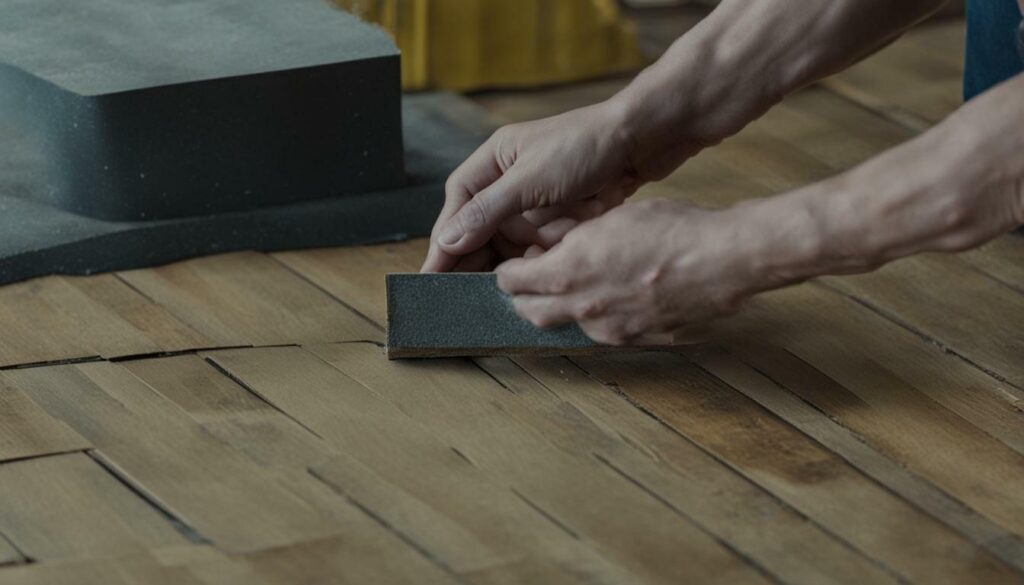
Sanding the Floor
Now that you’ve prepared the floor, it’s time to dive into the sanding process. Follow these step-by-step instructions to sand your parquet floor effectively.
1. Start by selecting the appropriate sandpaper for your parquet flooring. For general sanding, a medium-grit sandpaper (around 80-100) is a good starting point. If you have deeper scratches or imperfections, you may need to begin with a coarse-grit sandpaper (around 40-60) and gradually work your way up to finer grits.
2. Attach the sandpaper to a floor sander or a handheld orbital sander, ensuring that it is securely in place. Move the sander in the direction of the wood grain, working section by section. Keep the sander moving at a steady pace to avoid creating uneven spots.
3. As you sand, pay close attention to the surface. Stop sanding periodically to check the progress and ensure that you are achieving an even and smooth finish. If you notice any deep scratches or stubborn stains, you may need to go over those areas with a finer-grit sandpaper or use a specialized parquet floor repair kit.
4. Once you have completed sanding the entire floor, use a vacuum cleaner or broom to remove the dust and debris. Ensure that the floor is clean and free from any particles before moving on to the next step.

5. After sanding, you may notice small gaps or cracks in your parquet floor. Fill these gaps with a wood filler that matches the color of your floor. Follow the instructions on the filler packaging for the best results. Allow the filler to dry completely before proceeding.
6. To achieve a truly polished look, you may consider using a finishing product. Apply a layer of wood floor finish or polish to protect the surface and enhance its natural beauty. Use a brush or applicator to ensure even coverage. Allow the finish to dry according to the manufacturer’s instructions.
7. Finally, give your newly sanded and finished parquet floor a thorough cleaning. Use a damp mop or soft cloth to remove any remaining dust or residue. Avoid using excessive water, as it can damage the wood. Regularly maintain and clean your parquet floor to keep it looking its best for years to come.
| Step | Instructions |
|---|---|
| 1 | Select the appropriate sandpaper for your parquet flooring. |
| 2 | Attach the sandpaper to a floor sander or handheld orbital sander. |
| 3 | Move the sander in the direction of the wood grain, working section by section. |
| 4 | Check the progress periodically and address any deep scratches or stains. |
| 5 | Remove dust and debris from the sanded floor. |
| 6 | Fill any gaps or cracks with a matching wood filler and allow it to dry. |
| 7 | Apply a wood floor finish or polish for added protection and shine. |
| 8 | Clean the floor thoroughly with a damp mop or cloth. |
“Sanding your parquet floor is an important step in the restoration process. It not only removes imperfections but also prepares the surface for repair and finishing. Take your time, follow the instructions carefully, and enjoy the process of transforming your parquet floor into a stunning focal point in your home.”
Repairing Damaged Areas
If your parquet floor has suffered specific damages, this section will guide you through the process of repairing and restoring those problem areas. Whether it’s a cracked tile, a loose piece, or gaps between the flooring, these issues can be fixed with a little time and effort.
To repair cracked or damaged tiles, start by carefully removing the affected tile using a chisel and hammer. Be gentle to avoid causing further damage to the surrounding tiles. Once the damaged tile is removed, clean the area thoroughly to ensure proper adhesion of the new tile.
Next, measure and cut a replacement tile that matches the size and pattern of the existing tiles. Apply adhesive to the back of the replacement tile, then carefully place it into the empty space. Use a block of wood and a mallet to tap the tile gently, making sure it is level with the surrounding tiles. Wipe away any excess adhesive and allow it to dry according to the manufacturer’s instructions.
For loose pieces or gaps in the parquet flooring, you can use wood filler to fill in the space. Choose a wood filler that matches the color of your flooring for a seamless repair. Apply the filler to the gap or under the loose piece, using a putty knife to smooth it out. Once the filler is dry, sand it down to ensure a flush surface with the rest of the floor. Finish off by cleaning the area and applying a protective finish to the repaired section.

Repairing damaged areas of your parquet floor may require some time and patience, but with the right techniques and materials, you can restore the beauty and functionality of your flooring. Remember to take proper safety precautions, such as wearing gloves and eye protection, when working with tools and adhesives. Regularly inspect and maintain your parquet floor to prevent further damage and prolong its lifespan.
Summary:
- Cracked or damaged tiles can be replaced by carefully removing the affected tile and replacing it with a new one that matches the pattern.
- Loose pieces or gaps in the parquet flooring can be filled with wood filler, which should be sanded down for a smooth finish.
- Take safety precautions and maintain your parquet floor regularly to prevent further damage.
| SEO Keywords | Related Terms |
|---|---|
| repairing parquet flooring | parquet floor repair, fixing parquet flooring, repair damaged parquet floor |
| wood floor repair | parquet flooring repairs, parquet floor fix |
Finishing the Floor
Once you’ve completed the necessary repairs and sanding, it’s time to apply the finishing touches that will bring out the natural beauty of your parquet floor. The final stage of the process involves applying a protective finish, buffing, and cleaning to ensure a long-lasting and stunning result.
Start by carefully selecting a suitable finish for your parquet flooring. There are various options available, including polyurethane, wax, or oil-based finishes. Each type of finish has its own advantages, so consider factors such as durability, ease of application, and the desired look for your floor.
When applying the finish, follow the manufacturer’s instructions and use a clean, high-quality brush or applicator. Work in small sections, moving across the floor in a consistent motion to ensure an even application. Avoid applying too much finish at once, as this can lead to pooling or streaks. Allow the finish to dry thoroughly before proceeding to the next step.
Once the finish has dried, it’s time to buff the floor to achieve a smooth and lustrous surface. Use a buffing machine or a soft cloth to gently polish the floor, moving in the direction of the grain. This step will help to remove any minor imperfections and enhance the overall appearance of the parquet flooring.
Finally, give the floor a thorough cleaning to remove any dust or debris that may have accumulated during the finishing process. Use a damp mop or a specially formulated wood floor cleaner to ensure a streak-free and pristine result. Regular maintenance, including proper cleaning and periodic reapplication of the finish, will help to keep your parquet floor looking its best for years to come.

| Step | Action |
|---|---|
| 1 | Choose a suitable finish for your parquet floor. |
| 2 | Apply the finish following the manufacturer’s instructions. |
| 3 | Allow the finish to dry thoroughly. |
| 4 | Buff the floor to achieve a smooth and lustrous surface. |
| 5 | Clean the floor to remove any dust or debris. |
Conclusion
Congratulations on successfully completing the repair process for your parquet flooring. By following this guide, you have restored your floor’s natural beauty and prolonged its lifespan. Remember to prioritize regular maintenance and seek professional help for extensive damage.
Properly maintaining your parquet floor is essential to keep it looking its best. Regular cleaning and avoiding harsh chemicals will help preserve its shine and minimize wear and tear. If you notice any signs of damage or deterioration, promptly addressing them will prevent further issues.
While this guide provides comprehensive instructions for DIY repairs, it’s important to acknowledge the limitations. Minor repairs can be done by homeowners, but for extensive damage or complex issues, seeking professional assistance is recommended. Their expertise and specialized tools can ensure a high-quality repair job and prevent any potential complications.
By taking care of your parquet floor and following the steps outlined in this guide, you can enjoy its beauty and durability for years to come. So go ahead, walk confidently on your newly repaired floor, knowing that you’ve given it the attention it deserves.
FAQ
What is parquet flooring?
Parquet flooring is a type of wood flooring that consists of small wooden blocks arranged in decorative patterns. It is known for its unique and elegant appearance.
Why does parquet flooring require repair or restoration?
Over time, parquet flooring may become damaged due to wear and tear, moisture, or accidents. Repair or restoration is necessary to restore the floor’s beauty and functionality.
Can I repair parquet flooring myself?
Minor repairs can be done as a DIY project. However, extensive damage or complex repairs may require professional assistance.
What tools do I need to repair parquet flooring?
Some common tools needed for repairing parquet flooring include a hammer, chisel, adhesive, sandpaper, wood filler, and a floor finish applicator.
How do I assess the condition of the parquet floor?
Assessing the condition involves checking for loose or damaged tiles, measuring the thickness of the parquet, and evaluating the overall stability of the floor.
Do I need to sand the parquet floor for repair?
Sanding the parquet floor is often necessary to remove old finish, smooth out imperfections, and prepare the surface for repairs and refinishing.
How do I repair damaged areas of the parquet floor?
The method of repair depends on the type of damage. It may involve replacing individual tiles, fixing loose pieces, or filling gaps with wood filler.
Can I apply a protective finish to the repaired parquet floor?
Yes, applying a protective finish is essential to enhance the durability and appearance of the repaired parquet floor. It helps to prevent future damage and adds a beautiful sheen.
How often should I clean and maintain the parquet floor?
Regular cleaning and maintenance are crucial to keep the parquet floor looking its best. It is recommended to sweep or vacuum the floor regularly and use a specialized wood floor cleaner for periodic deep cleaning.
What safety precautions should I take when repairing parquet flooring?
When working with tools and chemicals, it is important to wear protective gear, ensure proper ventilation, and follow safety guidelines. Additionally, make sure to work in a well-lit area and keep children and pets away from the work zone.


