If you’ve ever walked into an old building with worn out or dingy-looking wooden floors, you know how much of an eyesore they can be. While neglect and poor maintenance can take a toll on wood floors over time, restoring them doesn’t have to be an impossible task. With the right expert tips and techniques, you can bring your neglected wooden floors back to life and make them look fabulous again.
Key Takeaways
- Wooden floors can last a lifetime when properly restored and maintained.
- Assessing the condition of your wooden floors is the first step in the restoration process.
- Cleaning, sanding, and preparing the surface is crucial before any other treatments.
- Staining and finishing are essential for restoring the natural beauty of your wood floors.
- Maintain your restored wooden floors to ensure longevity and aesthetic appeal.
Understanding the Importance of Wooden Floor Restoration
Restoring and refurbishing neglected wooden floors has significant benefits beyond just improving their appearance. Wooden floor restoration not only enhances their longevity but also helps maintain their structural stability and adds value to your property. Proper floor refurbishment can save you a lot of money by preventing costly replacements and repairs later on.
Reviving worn-out wooden floors can also have a positive impact on indoor air quality by reducing dust and allergens, making it a healthier and safer environment to live in. Additionally, rejuvenating old wooden floors can contribute to the preservation of historical buildings and homes, maintaining their cultural and aesthetic value.
By hiring a professional floor restoration service or undertaking the task yourself, you can improve the overall appearance, functionality, and health of your living or working spaces.

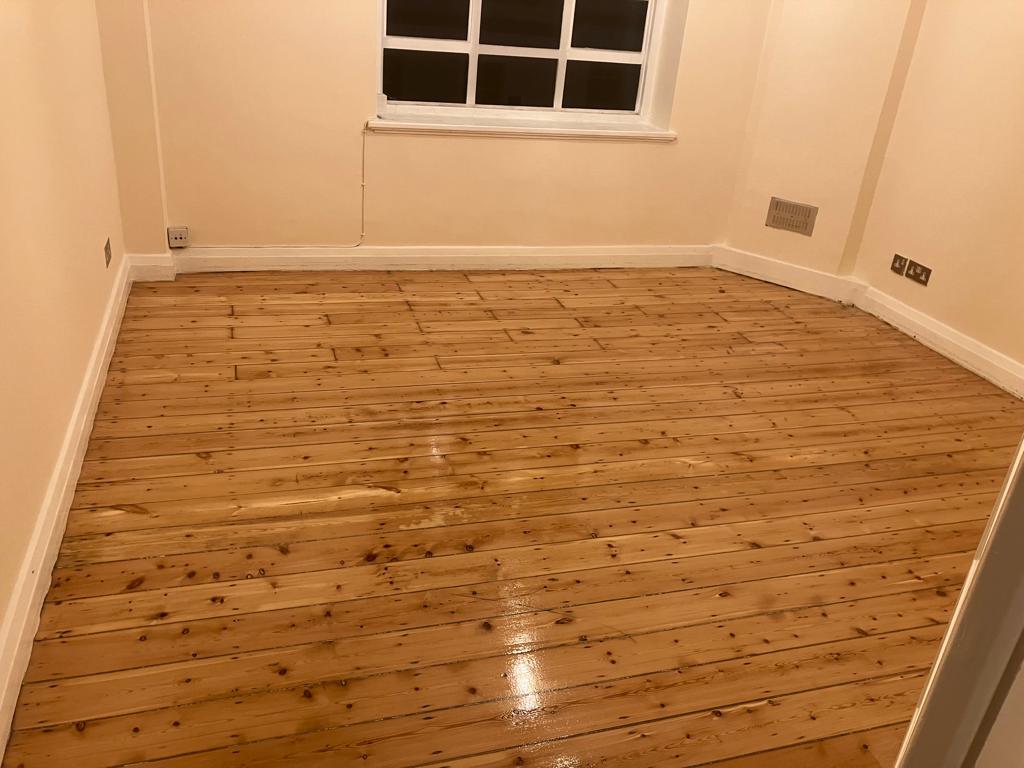
Reviving Neglected Wood Floors: Cleaning and Preparing
After assessing the condition of your wooden floors, it’s time to start reviving them. Cleaning and preparing the surface is a crucial step before moving forward with the restoration process. Start by removing any dirt, debris, or old finishes that may have accumulated on the surface over time. Deep cleaning the floor will help ensure proper adhesion of any treatments or finishes.
Begin by sweeping the floor with a broom or vacuum to remove any loose dirt or debris. Next, use a damp mop with a pH-neutral cleaner to clean the surface thoroughly. Avoid using excess water, which can damage the wood.
| Tip: | Always test a small section of the floor before using any cleaning products to avoid potential damage. |
|---|
After cleaning, the next step is to prepare the wood surface by sanding it. Sanding will remove any remaining old finishes and reveal bare wood needed for the refinishing process. Start with a coarse-grit sandpaper and gradually move towards a finer-grit sandpaper to achieve a smooth, even surface.
| Note: | Avoid over-sanding the surface, as it can expose nails and cause splinters. |
|---|
Once you’ve sanded the entire floor, be sure to vacuum or wipe it down with a tack cloth to remove any dust or debris. This will help ensure the adhering of any subsequent treatments or finishes.
Preparing the surface of neglected wooden floors may be a daunting task for many DIY enthusiasts, but it’s worth it. Properly preparing the surface will allow subsequent treatments or finishes and give the floors a new lease of life.

Making the Choice Between Staining or Oiling
The choice between staining and oiling your wooden floor can be a difficult one. While both techniques are effective, they have different finishes and levels of protection. Staining adds color while providing a smooth surface finish. Oiling, on the other hand, enhances the natural beauty of the wood and provides a more natural-looking finish. In addition, oiling is easier to repair than staining as it only requires a new application of oil. Staining, on the other hand, requires sanding back to bare wood before applying a new coat of stain.
| Staining | Oiling |
|---|---|
| Adds color to the wood | Enhances natural beauty of the wood |
| Smooth surface finish | Natural-looking finish |
| Requires sanding before reapplication | Easy to repair with new application of oil |
| Protects against wear and tear | Provides a protective barrier against spills and stains |
“The use of stains and oils depends on the wood species, room size, and decor style. A hardwood floor rejuvenation professional can provide guidance in choosing the appropriate finish.”
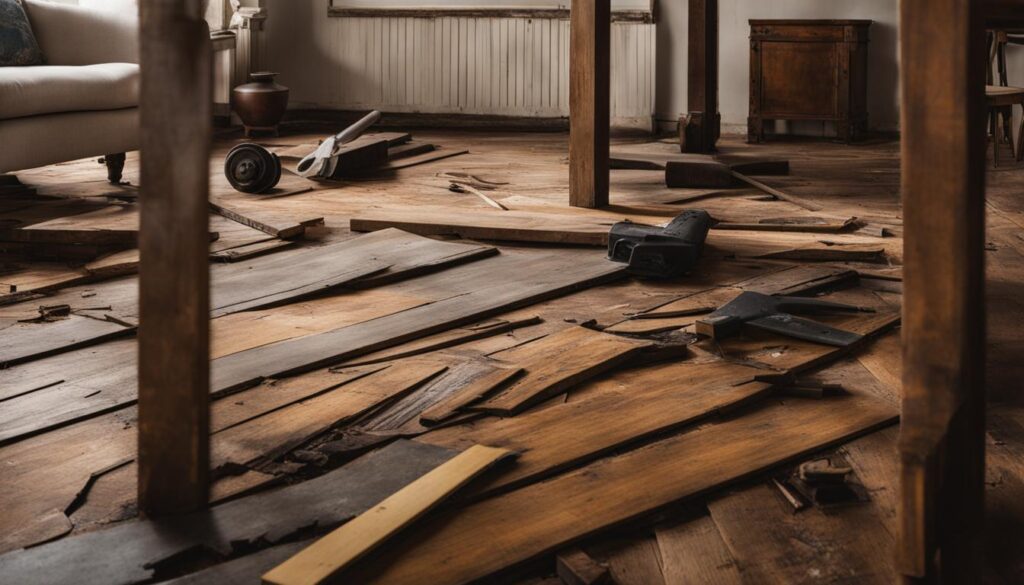
Repairing Damaged Areas: Patching and Refinishing
Inevitably, some wood floors may have damaged or worn-out areas that require special attention. These areas can be unsightly and distract from the beauty of the rest of the floor. Fortunately, patching and refinishing techniques can help restore these areas and create a seamless appearance throughout the space.
When repairing damaged sections of wood floor, the first step is to remove any debris or loose wood pieces from the area. Sand down the edges of the damaged section to create a smooth surface. Depending on the size of the damaged area, you may need to create a template to ensure a precise fit for the patch.
Next, cut a piece of wood that matches the species, grain, and thickness of the surrounding floorboards. Attach the patch securely with adhesive, nails, or screws. Counter-sink any nails or screws and fill the holes with wood filler.
Once the patch is in place, sand the entire floor to create a smooth and even surface. Take care to sand the patch area to match the surrounding floorboards. Apply a stain that closely resembles the surrounding floor color, and allow it to dry thoroughly. Finally, apply a protective finish coat to the entire floor to ensure uniform appearance and long-term durability.

By completing patching and refinishing techniques, you can bring your worn-out wooden floors back to life. These techniques are a cost-effective alternative to completely replacing the floor, and they can restore the beauty of your space.
Maintaining and Preserving Your Restored Wood Floors
After rescuing your wooden floors from neglect and restoring their natural beauty, it is important to establish a floor maintenance routine to keep them looking their best. Proper care will not only preserve the floors’ appearance but also extend their lifespan. Here are essential tips and practices for maintaining and preserving your newly restored wood floors:
Clean Regularly
To keep your wood floors looking their best, regular cleaning is necessary. Sweep or vacuum floors regularly to remove dirt and dust. If needed, you can use a damp mop or cloth to clean the floors. Be sure to avoid using excessive water, which can damage the surface of the wood.
Use Furniture Pads
Place furniture pads on the bottom of furniture legs to protect your floors from scratches and dents caused by moving furniture.
Avoid High Heels and Sharp Objects
Avoid walking on wood floors with high heels or sharp shoes that can damage the surface. Also, avoid dragging heavy or sharp objects across the floors, as this can scratch or dent the wood.
Protect from Sunlight
Direct sunlight can discolor and damage wood floors. To protect your floors from sunlight, install blinds or curtains to reduce exposure during peak hours.
Occasional Maintenance
Occasionally, your wood floors may require additional maintenance, such as recoating or refinishing. Keep an eye out for wear and tear that may need attention. It is recommended to hire a professional floor maintenance service to ensure proper care of your wood floors.
| Maintenance Tips: | Frequency: |
|---|---|
| Protect with a sealant | Every 2-3 years |
| Buff and recoat | Every 5-10 years |
| Sand and refinish | Every 10-15 years |
Stick to a regular cleaning and maintenance plan, and your restored wood floors will continue to look beautiful for many years to come.

Conclusion
In conclusion, rescuing wooden floors from neglect is a labour of love that requires time, effort, and expertise. However, the rewards are immense, as you can enjoy the natural beauty and warmth of a well-maintained wood floor for years to come.
We hope that this article has provided you with valuable insights and techniques to restore and rejuvenate your neglected wood floors. Remember to assess the condition of your floors, deep clean and prepare the surface, apply appropriate stains and finishes, and repair any damaged areas to achieve a seamless and uniform appearance.
Lastly, establish a maintenance routine to preserve the beauty and extend the lifespan of your restored wood floors. Regular cleaning, polishing, and protecting from scratches and moisture will ensure that your wood floors remain fabulous for decades.
So go ahead, rescue your forgotten wood floors from neglect, and give them the attention they deserve. You won’t regret it!
FAQ
What is wooden floor restoration?
Wooden floor restoration refers to the process of rejuvenating and reviving neglected or worn-out wood floors. It involves various steps such as cleaning, sanding, repairing damaged areas, and applying finishes to bring back the natural beauty and extend the lifespan of the floor.
Why is wooden floor restoration important?
Wooden floor restoration is essential to maintain the longevity and aesthetic appeal of neglected wood floors. It helps to repair any damages, remove scratches or stains, and enhance the overall appearance of the floor. Additionally, restoration can increase the value of your property and save you money by avoiding the need for costly replacements.
How can I assess the condition of my wood floors?
To assess the condition of your wood floors, start by inspecting the surface for scratches, dents, or wear-and-tear. Check for any loose or damaged floorboards, gaps between planks, or signs of water damage. You can also analyze the finish to determine if it needs to be stripped and refinished.
What should I do to prepare my neglected wood floors for restoration?
Before restoring neglected wood floors, it is crucial to clean and prepare the surface properly. Start with a deep cleaning, removing any dirt, grime, or old wax. Then, sand the floor to smooth out imperfections and ensure proper adhesion of stains and finishes. Lastly, make sure to repair any damaged areas or replace loose floorboards.
What types of stains and finishes should I use to restore my wood floors?
The choice of stains and finishes depends on the desired look and the type of wood you have. There are various options, including oil-based stains, water-based stains, pigment stains, and dye stains. Finishes can range from polyurethane, varnish, oil-based finishes, or wax. Consult with a wood flooring specialist to determine the best products for your specific needs.
How do I repair damaged areas on my wood floors?
To repair damaged areas on wood floors, you can use patching techniques. This involves removing the damaged section and replacing it with new wood, then sanding and refinishing the area to match the rest of the floor. For smaller scratches or dents, you can use wood fillers or touch-up kits to blend and repair the surface.
How can I maintain my restored wood floors?
To maintain restored wood floors, it is important to establish a regular cleaning routine. Avoid using harsh chemicals or abrasive materials that could damage the finish. Instead, use a soft broom or vacuum to remove dirt and debris, and mop with a damp cloth or hardwood floor cleaner. Additionally, use furniture pads to protect the floor from scratches and avoid excessive moisture.