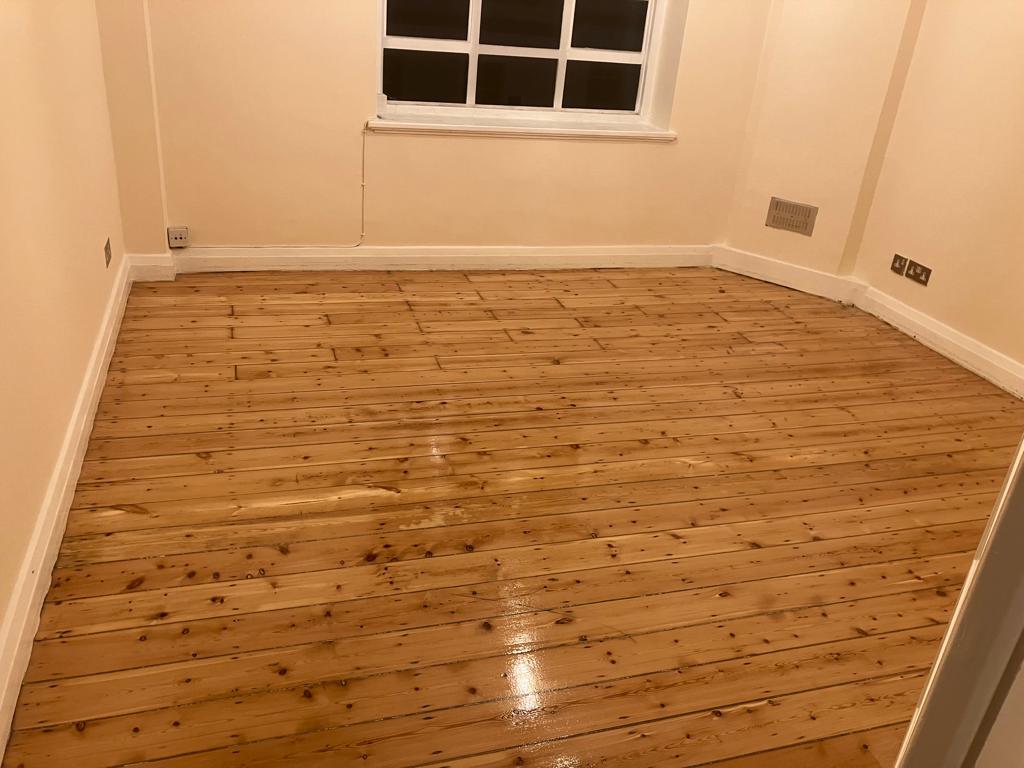
Wood floors are timeless, durable, and elegant. They have a natural beauty that can instantly transform any space into a warm, inviting environment. However, over time, wear and tear, as well as environmental factors, can take their toll on your wood floors. Scratches, dents, and a dull finish can make them look aged and worn. That’s where wood floor restoration comes into play. Restoring your wood floors can bring back their original beauty and protect them from further damage.
Key Takeaways:
- Restoring old wood floors can revive their natural beauty and protect them from further damage.
- Assess the damage to your wood floors before starting the restoration process.
- Choose the right restoration method based on the extent of the damage.
- Prepare the workspace properly before beginning the restoration project.
- Sanding and finishing are essential steps in restoring wood floors.
Assessing the Damage
The first step in any wood floor restoration project is to assess the condition of your floors. Properly evaluating the damage will help determine the best approach for restoring your wood floors and ensure a successful restoration process.
Wood Floor Condition
To begin the assessment, carefully examine the overall condition of your wood floors. Look for any noticeable signs of wear and tear, such as scratches, dents, stains, or fading. These surface imperfections can impact the overall appearance of your floors and may require specific restoration techniques to address them.

Surface Scratches and Deep Gouges
Surface scratches and deep gouges can significantly affect the aesthetics of your wood floors. Run your fingers across the surface to feel for any rough spots or indentations. Note the severity and extent of these imperfections as they may require different levels of repair or restoration.
Stains and Fading
Stains and fading can occur due to spills, sun exposure, or prolonged wear. Examine your wood floors for any discolored areas or patches that have lost their original coloration. These areas may require special treatment, such as sanding, staining, or refinishing, to restore them to their former glory.
Loose Boards and Structural Issues
Check for any loose or uneven boards in your wood floors. Walking across the surface may reveal areas that feel unstable or creak underfoot. Structural issues like these should be addressed before proceeding with the restoration process to ensure a stable and long-lasting result.
Water Damage and Insect Infestation
Inspect your wood floors for any signs of water damage, such as warping, cupping, or discoloration. These issues may indicate underlying moisture problems that must be resolved to prevent further damage. Additionally, look for any evidence of insect infestation, such as holes or trails, which may require professional intervention.
By thoroughly assessing the damage to your wood floors, you can develop a clear understanding of the restoration work ahead. This evaluation will guide you in selecting the appropriate restoration methods and ensure that your efforts yield the best possible results.
Choosing the Right Restoration Method
Once you have assessed the damage, it’s time to choose the appropriate restoration method. There are two main approaches to restoring wood floors: refinishing and recoating.
Refinishing involves sanding down the wood floor to remove the existing finish and any surface imperfections, then applying a new finish. This method is ideal for floors with significant damage, such as deep scratches, gouges, or severe discoloration. By sanding down the surface, refinishing can eliminate deep scratches and restore the smoothness of your floor.
Recoating, on the other hand, is a less invasive method suitable for floors with minor surface damage or wear. This process involves lightly sanding the existing finish and applying a new topcoat. Recoating preserves the existing finish and color while providing an additional layer of protection. It’s an excellent choice to refresh the appearance of your floor and enhance its durability.
Refinishing
Refinishing is the preferred method for wood floors with significant damage, including:
- Deep scratches
- Gouges
- Severe discoloration
- Surface damage
- Wear
Recoating
Recoating is suitable for wood floors with minor surface damage, such as:
- Light scratches
- Scuffs
- Surface wear
By properly assessing the condition of your wood floors and choosing the right restoration method, you can revive and rejuvenate their appearance. Whether you opt for refinishing or recoating, both methods can transform your worn-out floor into a revitalized and beautiful focal point in your space.
| Restoration Method | Damage | Method Description |
|---|---|---|
| Refinishing | Deep scratches, gouges, severe discoloration, surface damage, wear | Sanding down the wood floor to remove existing finish and imperfections, then applying a new finish |
| Recoating | Light scratches, scuffs, surface wear | Lightly sanding the existing finish and applying a new topcoat |

Preparing for Restoration
Before you begin the wood floor restoration process, it’s crucial to prepare the workspace properly. Taking the time to set up your workspace and protect your belongings will ensure a smooth and successful restoration project.
1. Furniture Removal
First, remove all furniture, rugs, and any other items from the room. This will provide you with a clear space to work and prevent any potential damage to your belongings during the restoration process.
2. Sealing Off Openings
Next, seal off doorways, vents, and any other openings in the room using plastic sheeting and tape. This will help contain dust and debris, keeping it localized to the workspace and minimizing its spread to other areas of your home.
3. Workspace Preparation
Protect nearby surfaces by using drop cloths or plastic sheeting. This will safeguard them from any accidental spills or scratches during the restoration process. Additionally, ensure proper ventilation in the work area by opening windows or using fans to prevent the buildup of fumes or excessive dust. Adequate lighting is also essential, so make sure the workspace is well-lit to ensure precision and accuracy during the restoration process.
4. Gathering Tools and Materials
Lastly, gather all the necessary tools and materials you’ll need for the restoration project. This may include sanding equipment, stain, finish, brushes, and safety gear such as gloves and goggles. Having everything ready and easily accessible will save you time and make the restoration process more efficient.
By following these steps for preparing your workspace, you’ll create an environment conducive to successful wood floor restoration. The next section will delve into the sanding and finishing process, which plays a crucial role in restoring your wood floors to their former glory.

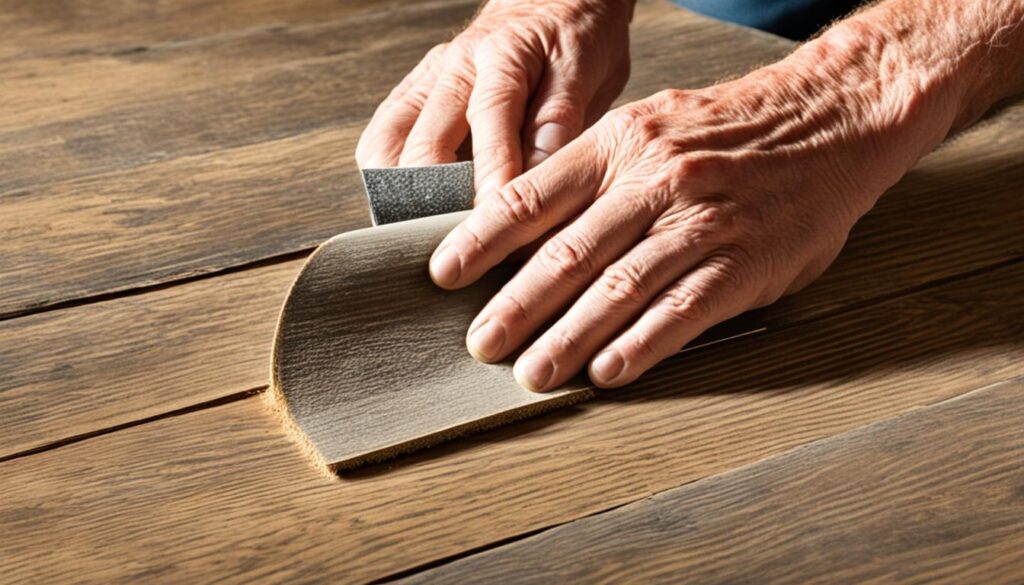
Sanding and Finishing
The sanding process is a crucial step in the restoration process. It involves using a drum sander and edger to remove the old finish, smooth out imperfections, and prepare the wood for the new finish. Sanding the wood floor is done in three stages: coarse sanding, medium sanding, and fine sanding.
Coarse sanding is the initial stage where the rough surface of the wood and any deep scratches are smoothed out. This removes the top layer of the old finish and prepares the floor for the next sanding stage.
Medium sanding comes next, where the floor is further smoothed to eliminate any scratches or imperfections left from the coarse sanding. This stage ensures a more even and uniform surface.
Finally, fine sanding is done to achieve a smooth and flawless finish. It removes any remaining marks or scratches, giving the wood floor a soft and polished look. Fine sanding prepares the floor for stain application, allowing the color to penetrate evenly.
If desired, you can stain the wood floor after sanding to change its color or enhance the natural grain. Staining adds depth and character to the wood, creating a unique and personalized appearance.

After sanding and staining, the last step in the restoration process is applying the finish. There are different types of wood floor finishes available, each with its unique characteristics:
- Water-Based Polyurethane: A popular choice for its clear finish and low odor. It dries quickly and provides excellent durability and protection against wear and tear.
- Oil-Based Polyurethane: Known for its rich amber color and high durability, oil-based polyurethane offers a classic look with a glossy or satin finish. It takes longer to dry compared to water-based options.
- Natural Oil Finishes: These finishes penetrate the wood, enhancing its natural beauty and providing a matte or satin appearance. They require regular maintenance but offer excellent durability and environmental benefits.
Choosing the right wood floor finish depends on your desired aesthetic, durability requirements, and maintenance preferences. Each type has its advantages, so consider the specific needs of your space before making a decision.
Conclusion
Wood floor restoration is both an art and a science, requiring patience, skill, and attention to detail. By following the steps outlined in this guide, you can bring your wood floors back to their original beauty and ensure they remain a stunning feature in your home for years to come.
Remember to assess the damage to determine the extent of repairs needed. Whether refinishing or recoating, choose the right restoration method based on the level of wear and damage your floors have experienced. Preparing your workspace properly is crucial to ensure a seamless restoration process.
Sanding the wood floor and applying the finish are essential steps in achieving a flawless restoration. Consider staining the wood to enhance its natural beauty or change its color. Lastly, ongoing wood floor maintenance is key to preserving their newfound elegance and prolonging their lifespan. Regular cleaning and proper care will help maintain their beauty for years to come.